 Rants, Raves and
Revelation – February
Rants, Raves and
Revelation – February
How To Create a Basic PDF Form
By Harry {doc} Babad
Introduction
As I was reading Paul Taylor's Hints & Tips column http://www.mac-hints-tips.com,
one of his tips was sufficiently useful that I thought I’d create a stand-alone
tip by illustrating the input provided by Max Rechtman, LIMac Forum, Long
Island, NY. http://www.limac.org/ This tip is used with both Max and Paul’s permission.
Indeed, I was delighted
that the tip was a more concise set of directions that I was able to extract
from Doug SahlinsHow to Do Everything with Adobe Acrobat 7.0 McGraw-Hill Osborne Media, 2005 or from
the help files in Acrobat 8. Reviews for both these products have appeared in
macC. Where I’ve updated the original material my inputs are either italicized
or clearly identified.
In reality, this 3Rs columns has been sitting for about
6-months because I was too tied up with other stuff. But as I re-read the
column it still makes sense to I’ll share it with you.
Getting Started
To create a basic form,
all you need to do is convert your form to PDF and overlay form fields. So
you’re the master of your bureaucracy, with paperwork going out into the world
and coming home full of new and interesting information that needs to be
processed.
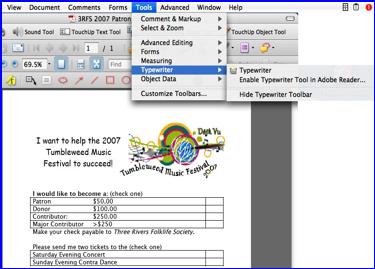
For an example, I am
using, as an example, a form I modified for fund raising for the 2007
Tumbleweed Music Festival, here in the Tri-Cities.
Because I’m, doc_Babad,
using a form, which asks for contributions, there are four ways the
initiating organization and the donor can deal with the transaction. That
assumes of course some wants to make a donation. In the image below, I only
show part of the form. Obviously donor contact information and ticket pickup
also needs to be a part of it. Your simple choices…
- Fill out a printed
paper form by hand and mail it with a check [Uck, hard to read] If the
organization takes credit cards filling in your card number also works
on in “letter”.
- Fill out a scanned
PDF copy of the form on your computer using Acrobat’s typewriter
feature, print the form, and mail it with a check (more legible).
- Fill out a form on the computer, print the form, and email it via
a PayPal account using a credit card number (no check or letter to mail)
Note that emailing a completed form, as a promissory note, is another
alternative. That is comparable to a pledge form at your favorite
charity of church.
|
For this tip, as does Max Rechtman, lets focus on creating the form not worry of about the mechanics of sending your donation.
As Max Rechtman noted, the traditional paper-based workflow can
be time-consuming and expensive. Digitizing the whole process speeds up not
only the sending and receiving of forms, but the processing of the information
your organization receives.
PDF forms can be emailed as an attachment, saving you from printing a document,
feeding the paper into a fax machine and waiting for a return receipt.
Putting Forms on Your
Website — You can also post
a PDF form to your Web site and make it available for download. Users can
download forms and save them to the desktop, giving them time to fill in
lengthy documents rather than having to do it all in a single sitting through
your site. And, since the form is a PDF, you don’t have to worry about users
casually destroying your form’s presentation or format.
For Advanced Users — Once you feel comfortable with the basics
of manipulating PDF forms, you can automate the extraction of data into
spreadsheets and databases. This comes in handy particularly when dealing with
large numbers of forms that need to be processed.
The Form Itself
The most basic type of PDF form is the “print and fill.”
Like traditional paper forms, these are designed to be filled out by hand, but
can be found online and printed to be returned via snail mail. [Choice 1
above.]
Flipping that paradigm, you have “fill and print” forms.
Acrobat 7 or 8 users can save these forms after filling them out, but Adobe
Reader users can only print and send the forms if they were created with
Acrobat 7. The PDF can also be printed and
the forms filled out the old-fashioned way, or a user can type the text into
the forms, and then print the completed document for submission. [Choice 2.]
Now, Acrobat 8, which you
need to create forms, now allows users of Acrobat Reader (Reader as its now
called) to also fill out forms. So in this hint I am assuming that the reader
feature is enabled, a discussion which is out of scope for this article. Now
both Acrobat and Reader users can email the filled out form but in my
example, the check must be sent by snail mail. (doc) Shucks! |
The general procedure for creating a form in Acrobat 7.0 or
8.0 and Professional is to start by creating a form document in any
application, such as Microsoft Word, or converting a paper form into PDF. If
you’re starting from scratch, you may want to download some of the free
Microsoft Word templates. Be sure that you
are happy with the way your document looks before converting into a PDF, as you
won’t be able to change the form layout in Acrobat. Make a copy of your Word document to preserve the original
formatting.
MS Word to PDF— There are dozens of third-party programs available for converting Word
documents to PDF, but you’ll always want to keep an original copy of your file
on hand no matter which you use.
If you have Acrobat, the simplest method for creating PDF
files is to use the Adobe PDF printer, which is added to MS Word when Acrobat
is installed:

1. In Word, choose File > Print.
2. Choose “Adobe PDF” from the Printer Name pop-up menu.
3. Click “OK,” and specify a file name and location for the
PDF file, then click Save.
Form-izing Your PDF
in Acrobat — Open your
new PDF in Acrobat. If you are adding multiple forms to a document you should
open the Forms Toolbar on your desktop. From the toolbar, choose Tools >
Forms > Show Forms Toolbar.
To insert a text field,
click the Text Field tool on your Forms Toolbar, and then use the mouse to draw
a marquee around the area in which you want to create a form field (such as the
fill-in line for name, address, ZIP code, and so forth).
Hold the left button while
drawing the box, and when you release a Text Field Properties window will
appear letting you set options. The default options are “Scroll long text” and
“Check spelling.” If you intend to print the document as is, you should turn
off the Scroll feature, because not doing so means that you won’t see any of
the scrolled text when printing.
Other options include
“Multi-line” for long form entries (such as comments) and “Allow Rich Text
Formatting,” which lets users apply text styles such as bold and italics to
their entries.
Tip — You can also password-protect the field
for extra security. You must designate each form field with a unique name.
[Read the Acrobat Help File.]
From the Properties box,
choose “General” and fill in the field name. These names will not be visible to
the user, but they will be used for database connectivity (should you choose to
implement that option at a later time).
Then choose the type of form field from the Type pull-down,
and add a description of the field in the Short Description box. This is used
by the screen reader for vision-impaired users.
Click “OK” to accept the default settings, and you have
created your first form.
Hint—
In addition to inserting a Text Field, which would be used for areas like Name or Address on a paper form,
you can insert a Signature Fieldfor digitally signing the document. Radio Buttonscan be added for letting your user choose only one
option from a list such as Yes/No boxes, or you can use Combo Boxes for
pull-down menus with editable text boxes.
CREDITS:
Many thanks to Max Rechtman for his lucid tip, it was
clearer than the longer draft article I had written.
Max
Rechtman, LIMac Forum, Long Island, NY
February 2007 —
Hints & Tips http://www.mac-hints-tips.com
