doc_Babad's Macintosh
Tips - A Macintosh Tip or Three…
March
2008 Edition
By Harry {doc} Babad ©
2008
Product and company
names and logos in this review may be registered trademarks of their
respective companies.
The software related tips were tested on a 1 GHz dual
processor PowerPC G4 Macintosh with 2 GB DDR SDRAM; running under Macintosh
OS X OS X 10.4.11.
|

|
This month I continue
sharing my occasional tip related finds with you. For a change I’ve focused,
three tips on related to turning Vinyl or Tape to CD, These tips were motivated by an outstanding
presentation on the 14th of February by Scott Armstrong the
president of the Mid-Columbia Macintosh Users Group [McMUG] here in Tri-Cites, Washington.
As the occasion warrants,
some of the Tips I share come from Paul Taylor's Hints & Tips column, and are used with his permission.
Where I use any
one else’s tips for this column, I acknowledge both their source and their
contributors. Yes, I do write some of the tips I’ve discovered while Macin’
around.
Oh, I almost forgot!
Unless otherwise noted, all the tips and tidbits I share, where appropriate,
work on my computer. If I don't own the software but if the tip sounds interesting,
I'll so note that factoid at the end of that specific write-up.
Tips I’ve provided this
month, as always in a random order, include:
- A Leopard Ready Substitute for Fruit Menu, an
Unsanity, LTD Haxie.
- Punctuation:
Which Dash Symbol?
- Three
Easy Ways to Encrypt {and protect} Your Data
- A
Leopard Ready Substitute for Fruit Menu, an Unsanity Haxie
- Whether
to go to Cassette or to CDs for You’re Treasured Vinyl
- There’s
Too Much Static In The Grooves — Some Solutions
- How to Unwarp a Phonograph Record - At Your Own
Risk
- Make
Exact Disk Copies with Apple’s Tools
Punctuation:
Which Dash Symbol?
There are three dash characters in every font: the hyphen,
the en-dash, and the em-dash. The hyphen (-) is shortest, the em-dash ( —
) is the same length as the point size of the type, and the en-dash ( — )
is half the length of the em-dash.
However, some fonts, including several installed
with Mac OS, ignore these typographic traditions, and their em-dash is quite
long.
Generally, use a hyphen (-) for hyphenating
words and groups of words; just press the hyphen key. Use an en-dash (–)
for separating numbers and dates (25–30, May 19–20); press
Option/hyphen for an en-dash. Use an em-dash (—) where uneducated users
place double-hyphens; press Shift/Option/hyphen for an em-dash.
Using a space before and after an em-dash is optional.
Exceptions: you’ll notice that the width of the
en-dash and em-dash vary by typeface. If the em-dash looks too long, try an
en-dash instead.
Design
Tools Monthly
Paul
Taylor January-February Hints and Tips
paul@mac-hints-tips.com
Three Easy Ways to Encrypt {and protect} Your Data
1. Create An Encrypted
PDF — It’s very easy to
create a PDF in 10.4. Open the document you want to save as an encrypted PDF
file, and choose File > Print. The print dialogue box opens up. Click “PDF”
in the lower left corner of the print dialog box.
To create an encrypted PDF
file, choose “Encrypt PDF” and enter a password. Anyone who wants to open the
PDF file will need to enter that password. Of course, try and choose a
difficult to guess password.
In your encrypted PDF, all
graphics are at full resolution, and the file includes each font character it
uses. Thus, in OS 10.4, any document that can be printed can also be stored as
an encrypted PDF file. Pretty cool!
You can also create a PDF
file of a document by clicking the “Preview” button in the Print dialog, and
then choosing File > Save As.
2. Create An Encrypted
Disk Image — Disk Utility,
which is part of OS X, can easily make an encrypted Disk Image. In this case,
“disk image” works like a virtual CD-R or flash key. Use an encrypted disk
image to store lots of documents, or different kinds of data, such as PDFs,
photos, Word documents, music, etc. You can even store encrypted PDFs in an
encrypted disk image for drastic security!
To make an encrypted,
password-protected disk image, browse to the Disk Utility program, which by
default is stored in the Utilities Folder. The Utilities Folder is typically
found in the Applications Folder. Launch Disk Utility and select File > New
> Disk Image From Folder. Browse to the folder you want to encrypt. A dialog
box will come up, asking you to name the disk image you are about to create. At
the bottom of the dialog box are two drop-down tabs.
Select the “Encryption”
tab and choose “AES-128 encryption.” This is a very robust and fairly flexible
encryption scheme. It allows passwords up to 255 characters. It is important to
note that, if you forget your password, all data stored in the disk image will
be forever locked up.
Name this Disk Image and
select “Save As”. Disk Utility will create the encrypted disk image, and
typically will leave the new encrypted disk image on your desktop. When you try
and open the disk image, a window will pop up, asking you for your password
(unless you have saved the password to your keychain, in which case the image
will just pop open.)
You can add and remove data
from this disk image. However, as far as I know, you can’t later go back and
change the password on an encrypted disk image.
 3. Use A Third Party
Program
3. Use A Third Party
Program
Sometimes it’s easiest to
simply use a third-party program to lock up your data. I recommend Knox. It
simplifies making encrypted disk images, and gives you new ways of working with
them. Knox also allows you to make automatic backups to encrypted folders.
Knox is a great program to
install on your laptop, especially if you often travel with it.
Finally, just a reminder, every month we seem to hear about misplaced, lost,
or stolen laptops, that happen to be loaded with incredibly sensitive data. For
example, the Veterans Administration famously lost a laptop with the credit
reports of 26.5 million US veterans. ~ Ed
Small
Dog Electronics
Paul Taylor January-February
Hints and Tips
paul@mac-hints-tips.com
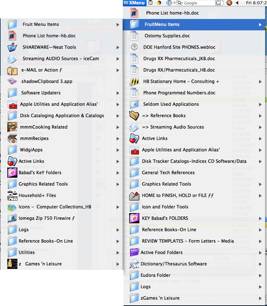
A Leopard Ready Substitute for Fruit Menu, an
Unsanity Haxie
For many years, prior to the
disruptive influences of OS X, I stored files and documents I wanted to access
quickly in the “Apple Menu” at the left of my screen. For those of you who
don’t know what Fruit Menu does, in Tiger and earlier OS X systems: FruitMenu
is a haxie that gives you the ability to customize the Apple Menu and
contextual menus.
Using a visual editor you can edit the contents of the menus
to suit your needs and taste. FruitMenu will also display the contents of the
FruitMenu Items folder inside of your Library folder, launch applications and
shell scripts from the Apple Menu and contextual menus, to allow easy file
navigation and launching.”
Of course the Fruit Menu folder shouldn’t be filled
with duplicates of you applications or documents. Alias’ work quite well and
don’t create either hard disk bloat or duplicate documents, files that need to
be synchronized. Since Unsanity has not yet released Leopard compliant version
of its software, and I’m switching to Leopard right-soon, I did some checking.
Much to my surprise, I had an ideal Leopard ready solution already
installed on my drive. The software by DEVON Technologies is called XMenu and version 1.8.1, specifically the ability to
create a User Defined folder as a menu item, does the trick. Specifically the FREEWARE XMenu brings back the
Apple Menu to Mac OS X and also includes a complete application launcher. XMenu
adds one or more global menus to the right side of the menu bar. They give you
access to your preferred applications, folders,
documents, and files. XMenu is the
ideal addition to Mac OS X 10.5 Leopard as the switch to stacks makes folders
in the Dock unusable for quick access to applications or folders with
sub-folders.
Furthermore there's no
explicit need for a configuration (e.g. creating lots of folders and aliases or
adding items to user-defined setups) - just activate the menus you like. All
menus and submenus update themselves automatically just like the good old Apple
Menu so it's not necessary to refresh them manually. In addition, XMenu
optionally displays small or large icons and follows aliases and symbolic
links. Finally, please note that contrary to most other solutions, this is
neither a hack ("haxie") nor an unofficial menu extra.”
The how to: I've dragged
the contents of Fruit Menu folder (in my user library to XMenu’s user defined
folder, in preparation for a Leopard Upgrade. It was a done deal. Remember
folks this all about aliases. Unlike to doc, dragging an application into XMenu
Users Folder duplicates the real thing. But as noted above you can easily
install, via the XMenu preference pane, applications, folders, documents, and
files.
Since I use only the User-Defined feature of XMenu; Alias’ are a must.
I then added a few spaces before its name (Fruit Menu Items) to bring it to the
top of my XMenu list.
Now all I need is a
substitute for Unsanity's Font Card and Mighty Mouse.
Harry (doc) Babad
for macCompanion
Whether to go to Cassette
or to CDs for You’re Treasured Vinyl
I recently attended a
discussion of how to turn vinyl into CDs at the Mid-Columbia Macintosh Users
group. Our president Scott Armstrong gave a masterful presentation, more
compelling because most of the attendees had collected large numbers of LPs
most of which were just sitting idly in storage while they spun CDs or listened
to downloaded music both at home or in their cars.
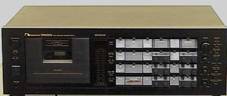 Many people I talked with
over the years, middle-of-the-road audiophiles, agreed that transferring an LP
to a cassette unless one had a Nakamichi Cassette
deck, lets say a
Nakamichi Dragon, and used
metal (chrome biased) tape, resulted in larger losses of sound quality than
desirable. Even on eBay such decks sell for more than $400-$700, the deck’s
operability/functionality is often misrepresented (e.g., auto-reverse doesn’t
work.)
Many people I talked with
over the years, middle-of-the-road audiophiles, agreed that transferring an LP
to a cassette unless one had a Nakamichi Cassette
deck, lets say a
Nakamichi Dragon, and used
metal (chrome biased) tape, resulted in larger losses of sound quality than
desirable. Even on eBay such decks sell for more than $400-$700, the deck’s
operability/functionality is often misrepresented (e.g., auto-reverse doesn’t
work.)
The result for just going from vinyl to cassette, an analog-to-analog
duplication process is not good. With mid-price stereo component equipment, you
get about mp3 sound quality. Now I’m hearing impaired but if I’ve read
correctly, the sound on your normal bias cassette is not as good as a lossless
mp3 format and certainly poorer in quality than the original album.
 My choice has been going
from Vinyl to CD. The good news is that it’s easier these days with USB
turntables that plug directly into your computer. If you have a stereo
turntable, then there are low-cost preamplifiers available [e.g., Behringer’s Microphono
PP400 or its sister products to boost the signal from the phonographs out put to
match the necessary gain needed by you computer – it must hear the signal. Thanks for the tip, Scott Armstrong.
This looks simpler than the clunky Radio Shack preamps I’ve saved for ten of
years.
My choice has been going
from Vinyl to CD. The good news is that it’s easier these days with USB
turntables that plug directly into your computer. If you have a stereo
turntable, then there are low-cost preamplifiers available [e.g., Behringer’s Microphono
PP400 or its sister products to boost the signal from the phonographs out put to
match the necessary gain needed by you computer – it must hear the signal. Thanks for the tip, Scott Armstrong.
This looks simpler than the clunky Radio Shack preamps I’ve saved for ten of
years.
Learn More — You’ll also need software such as Roxio’s CD
Spin Doctor, which come with Toast Titanium 8 software [$40 or $99
respectively] or the freeware program Audacity I’ve been told that Apple’s QuickTime Pro ($30) has
the capability to record LPs and create digital copies for burning to CDs.
Then all it takes is
software, cables and time… did say time?
Assuming you want to capture the sound
and make a simple label, that seems to take about 2x to 3x the album length.
Why, well cleaning the album, playing to check out groove skips, and then doing
the recording, followed by identifying and separating tracks takes time. If you
manually delete pops, hisses, hum, and crackle from your recording that too
takes time. You can have the software do these tasks — as does many of my
non-audiophile music loving friends.
Should you worry about
capturing liner notes as jewel case booklets and converting album jacket
covers to jewel case covers, you’ll need a scanner and graphics software as
well as software to create these labels. Did I say time consuming? I already
have all to tools to do the job, but time remains a real issue. At almost 72,
is this the way I want to spend my computing life?
I really don’t want to turn
you off of converting treasured LPs to CD’s, I just want you to understand that
although the process is relatively simple and the tools (hardware-software) are
reasonably priced, it does take time.
I’m so busy writing that I’ve not even
taken the time to determine which of the ca. 2000 LPs I own, are: (1) not
available as CDs already. Even at minimum wage my time is worth more than most
CDs. (2) Secondly, where should I start. That means cataloging the collection,
and getting real picky. The lowest price duplicating service I’ve found is $17 an album including the
artwork [Vintage54.com], to web advertised services charging upward of $40 an
album. I’m getting ready to try the lower cost service, since it close in price
to buying a CD. I’ll let you know.
Harry (doc) Babad for macCompanion
There’s Too Much Static In The Grooves — Some Solutions
 Turning Older Well-Listened
to Records to CDs — Some of our albums, (LP’s) were well loved by our
children and their friends. Despite the fact that we had a semi-automatic
turntable with vibration isolation features, kids dancing around and singing to
a Peter, Paul and Mary album, did unmentionable things to the recording. This
despite the fact that the youngsters were not allowed to touch the tone arm and
used a button to start and stop the album. I tried to protect the LPs by
copying the to cassettes for the youngsters, but that never took, the spinning
vinyl disk was more interesting.
Turning Older Well-Listened
to Records to CDs — Some of our albums, (LP’s) were well loved by our
children and their friends. Despite the fact that we had a semi-automatic
turntable with vibration isolation features, kids dancing around and singing to
a Peter, Paul and Mary album, did unmentionable things to the recording. This
despite the fact that the youngsters were not allowed to touch the tone arm and
used a button to start and stop the album. I tried to protect the LPs by
copying the to cassettes for the youngsters, but that never took, the spinning
vinyl disk was more interesting.
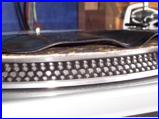
Is there a way to get good
CDs from a worn, slightly scratched, album? Perhaps. If you’ve a high quality
turntable that can use interchangeable stylus cartridges or even phonograph
styli (needles), try a different weight and diameter stylus. I still use a
vintage Benjamin Miracord 50H which allowed for interchangeable cartridges. The
included standard cartridge could play LP’s and 45’s, but needed a special
cartridge getting the best sound for 78’s.
Check whether you can still get a
diamond stylus that is wider in diameter and a bit heavier than the standard cartridge
that came with your device. Amazon.com stocks cartridges as may other vendors.
This may not be as hard as it seems since young people are rediscovering the
joys of the warmer sounds of an LP, and the record companies are catering to
their tastes.
The better the input, the
better the CD. A word of warning! Many individuals with both excellent trained
hearing and audiophile tastes find that CDs, even those made under the best
recording conditions and processing lack warmth. You may want to consider how
important that aspect is to your enjoyment of music. Certainly with older
records, changing stylus diameter and weight allows you to continue enjoying
the LP, but wears it out faster.
Harry (doc) Babad
for macCompanion
How to Unwarp a Phonograph
Record - At Your Own Risk
For
record collectors, the most mysterious question of them all -
"I've
got a record with a warp in it. How do I un-warp the record?"
In
a Utopian world
all records that were pressed to be flat would remain flat
for the duration of time. Unfortunately, sometimes records develop warps.
 Records can suffer from heat warps, which occurs when a record is
exposed to prolonged sunlight or stored near a radiator or furnace. Records can
also develop compression warps, when they are stored improperly and the vinyl
is actually bowed or bent over time. Warping is an equal-opportunity problem;
it affects shellac 78's, vinyl LP's and styrene 45's with equal malevolence.
Records can suffer from heat warps, which occurs when a record is
exposed to prolonged sunlight or stored near a radiator or furnace. Records can
also develop compression warps, when they are stored improperly and the vinyl
is actually bowed or bent over time. Warping is an equal-opportunity problem;
it affects shellac 78's, vinyl LP's and styrene 45's with equal malevolence.
Sometimes
a collector can compensate for a slight warp by simply adjust the tracking and
anti-skate on their turntable tone arm [see the preceding tip]. The larger and more pronounced the warp, however, the
more likely the needle will not track properly and the sound will be affected.
Sometimes, instead of the peaceful gradual glide from record edge to run out
groove, a warp can cause the tone arm to jerk and swing and bob and weave and
bounce and (sometimes) leap from the groove. No warped record should ever be
considered of a higher grade than Good. And, of course, the more severe the
warp, the lower the collectible value.
But
what do you do if, for example, your copy of Mike Oldfield's Tubular Bells has
developed a warp, and you want to un-warp the record? What if it was that
pressing of the Delfonics' "Didn't I Blow Your Mind (This Time)" that
was you and your girlfriend's favorite song? What if it was an old 78 of
Rosemary Clooney singing "Come On-a My House" and you wanted to fix
it so that it would play on your restored Victrola 78?
You
may want to save this column. I (Chuck) asked many different people about their
own un-warping techniques, and the success and failures of each. I also bounced
around the Internet, and found more than a few homemade un-warping formulas.
Before
you break out that Rolling Stones "I Wanna Be Your Man" 45 with the
slide edge warp and start any of these techniques, read these suggestions
carefully, and understand that:
(a) not every technique will work for every type of
record;
(b) un-warping a record is a very tricky process and
requires a lot of skill, patience and perseverance;
(c) you need to practice these techniques with records
to which you have NO emotional attachment (now where are my wife's Christopher
Cross records?).
And
many of these un-warping methods have varying degrees of success and failure;
and there is no guarantee that even if you do get the record flat, the grooves
will not acquire a hiss or a mistrack upon play. Neither Krause Publications or
myself is responsible for any damage caused by an attempt to un-warp a record -
in other words, if your Roy Orbison 45 gets damaged, don't come crying to me.
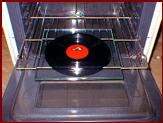 The "Oven Baking" method (has been known to work on
shellac 78's and thick vinyl LP's) — Many people swear that they can unwarp a record by using an oven. For
this recipe, you need two 14-inch square sheets of tempered glass and an oven.
The "Oven Baking" method (has been known to work on
shellac 78's and thick vinyl LP's) — Many people swear that they can unwarp a record by using an oven. For
this recipe, you need two 14-inch square sheets of tempered glass and an oven.
According to Greg Weaver, begin by preheating your oven to 150° degrees
Fahrenheit. {I’ve done this at a lower 125 degrees, as a safety precaution, and
it works.} [Doc sez go Centigrade and you’ve made a coaster or flat
Frisbee.]
Clean
your record and rinse with distilled water, to make sure there is no dust, dirt
or other residue in the grooves. Place the record between the two sheets of
tempered glass, then place in your oven. Wait 12 minutes. Carefully take your
glass-and-record sandwich out of the oven and place on a cooling rack for 30
minutes. Then gently remove the glass and inspect the record. It should have
returned to its original flatness. Oven temperatures and cooking times may
vary; you may have to add an extra two or three minutes in the oven to achieve
the desired results.
The
"Solar Baking" method (works best on shellac 78's). — “This method was discovered at the Roadhouse website, a popular local for EBay music buyers and sellers.
The formula requires two 14-inch pieces of 3/8" thick glass, two large
pieces of approx. 3/16" "place mat/craft" vinyl/foam, one
quality album sleeve, five pieces of cork and common household glue.
Trace
the outline of a 12" vinyl LP on the craft foam (make two of them, one for
top and one for bottom). Cut out the center on each craft foam sheet, so that
only the vinyl grooves are covered by the mats. Use common household glue to
attach five (5) pieces of cork on the bottom piece of glass to avoid any
clanking when setting it down, plus it makes it easy to pick back up.
Clean
the LP and place it inside a protective sleeve, such as a Discwasher VIP sleeve. Then place the record and sleeve between
the craft foam mats, and place all that between the two sheets of glass. Take
outside on a sunny day and let sit for 10 to 15 minutes (sun times may vary
whether you live in Houston or in Seattle). Bring the glass-and-record sandwich
inside and let it cool for a day. Then inspect.
The
"Hot Towel" method (may work better on 45's). — “For this you need a thick towel and heavy
books. Place the towel in the dryer for a full cycle (no need to use static
sheets). Once the dryer cycle is finished, take the towel out, place it on your
table. Lay a record flat on one end of the towel, cover the other side of the
record with the rest of the towel. Place heavy books on top the towel. Inspect
after 30 minutes. – {Doc sez, this does not seem either effective of
with towel lint any too clean. It’s nothing I would try}
The
"Heat and Bath" method — “This one is interesting. Once again, you place your records between
two plates of tempered glass and bake in the oven. While your record is baking,
go to your bathroom and fill your tub with cold water, at least four inches
deep. After your record has baked for twelve minutes or so, takes the
glass-and-vinyl sandwich out of the oven, carry it to your bathroom and
submerge the entire mixture into the cold tub water. After a few seconds, you
should be able to remove a flat record from your tub. Make sure you have used
tempered glass when cooking and submerging; some types of glass will fracture
after going from extreme heat to extreme cold.
Some
of the other un-warping formulae I've (Chuck) have come across involve
hand-held hair dryers, microwaves, wrapping in a towel and flattening it with a
steam iron - but no matter what method you use to flatten a record, be aware
that the following can happen:
- You could cause other heat warps
or ripples, where the concentric groove would no longer allow the needle to
track properly;
- You could melt dirt and debris
directly into the grooves if the record is not cleaned ahead of time;
- You could actually flatten the
grooves, making the record unplayable.
[Doc
agrees.] But what can you do if your
record is just too warped to play - or even repair? There are two suggestions.
One is to place a listing, letting web users know you want to buy a new copy of
your currently warped record.
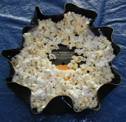 Or, you can get really creative with your warped record. Take a
12" album and apply heat to the grooves. As the record softens, pull up on
the edges until you have a bowl. Plug the record's center hole with a cork or
tape. After enough practice, you've created a decorative potato chip bowl - a
perfect party favor for Grammy night. And who said those arts and crafts classes
in school would never pay off? Just think - an M&M bowl made from an Eminem
Label 12" record.
Or, you can get really creative with your warped record. Take a
12" album and apply heat to the grooves. As the record softens, pull up on
the edges until you have a bowl. Plug the record's center hole with a cork or
tape. After enough practice, you've created a decorative potato chip bowl - a
perfect party favor for Grammy night. And who said those arts and crafts classes
in school would never pay off? Just think - an M&M bowl made from an Eminem
Label 12" record.
Notes:
1.I did a shorter tip of this
subject for macC in my tips column of March 2007.
2.Chuck suggests using the Goldmine want lists and his magazine to post such request, but
I found the links broken or not relevant.
3.Chuck Muller has a few other
methods in his article, check them out of you don’t find the ones presented
above useful.
4.I experimented with the odd and to
me uninteresting records I picked up for pennies at the local Good Will store.
Article by Chuck Miller
(This article was not copyrighted and attempts to
contact the author failed.)
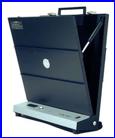 Every vinyl enthusiast has records in their collection or has come
across LPs they’d love to own, but were just too warped for any cartridge/arm
to track. The DFV-1 can be the one-stop, one-button solution to your problems.
The Furutech DFV-1 provides
controlled-heat perfect flattening for all your warped records, even those with
only slight irregularities just enough to unsettle your cartridge and cause
mistracking. But buying a widget to help comes at a high price, a mere $1500. Visit Furutech for
more information about their products or their Canadian distributor to
find out how you can get your hands on one of these units.
Every vinyl enthusiast has records in their collection or has come
across LPs they’d love to own, but were just too warped for any cartridge/arm
to track. The DFV-1 can be the one-stop, one-button solution to your problems.
The Furutech DFV-1 provides
controlled-heat perfect flattening for all your warped records, even those with
only slight irregularities just enough to unsettle your cartridge and cause
mistracking. But buying a widget to help comes at a high price, a mere $1500. Visit Furutech for
more information about their products or their Canadian distributor to
find out how you can get your hands on one of these units.
Make Exact Disk Copies with Apple’s Tools
OS 10.4’s Disk Utility makes it easy to make an exact copy
of a CD or DVD that can be stored on a hard drive as a disk image, or burned to
a CD or DVD for future use. First, insert the CD or DVD you want to backup into
your Mac. Next, drag the icon of the CD or DVD to the Disc Utility application
(which is usually stored in the Applications Folder > Utilities Folder.) In
other words, drag and drop the CD or DVD icon on top of the Disk Utility icon.

Disk Utility will launch, and then it will immediately open
a window asking you to name the new disk image, and where to save it. Go ahead
and save the image to your desktop.
In the Image Format drop-down menu, choose DVD/CD master.
This is especially important if you want to burn a copy of the disk, and have
it function as an exact clone of the original CD or DVD you hope to backup.
Now click “Save.” A new disk image will be created on your
Desktop, with the extension “.cdr,” It may take a few minutes to create this
file.
If you click on the disk image, you’ll see it works just
like a CD or DVD. You can store this new disk image on a hard drive. If you
want to burn it to CD or DVD, you should again use Disk Utility’s burn
function. Otherwise, you’ll only be burning a copy of the disk image, and not
an actual CD or DVD master. To burn a CD or DVD master, open Disk Utility and
look for the disk image of your CD or DVD, on the left side of the window.
Usually it’s at the bottom of the list of drives. Now, simply select the image,
and then click “Burn.” Follow the directions to burn the disk.
This is a great way to back up expensive software titles and
game titles. Many games that require a disk to run will run off of the disk
image — great for traveling. ~ Ed
Small Dog Electronics
Paul
Taylor January-February Hints and Tips
paul@mac-hints-tips.com
PS:
Note
that Doc sez you can do the same with Toast Titanium 8, a piece of software I
prefer to that provided by Apple, but of course that costs an extra $100 for a richer more versatile
and integrated software set.
That’s all folks… Harry {doc} Babad
